Recipes
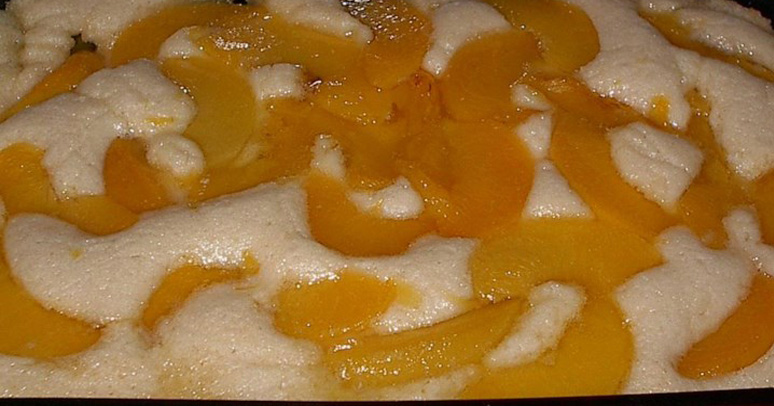
☺ Lazy Peach Cobbler Recipe
Ingredients:
- 1/2 cup margarine
- 2 cups all-purpose flour
- 1 cup white sugar
- 1 teaspoon baking powder
- 1 (29 ounce) can sliced peaches, juice reserved
- ADVERTISEMENT -
Instructions:
1Preheat oven to 350 degrees F (175 degrees C).
2Once oven reaches desired temperature, melt margarine in a glass 9×13 baking pan.
3In a large bowl, combine flour, sugar and baking powder. Pour reserved peach juice into dry ingredients and stir until smooth.
4Remove glass pan from oven and pour batter in starting in the center; batter will then spread itself over entire pan. Add peaches by placing them in center of pan; allow them to spread on their own.
5Bake cobbler in preheated oven for 20 to 25 minutes, or until brown on top. Do not overcook.

Your article helped me a lot, is there any more related content? Thanks!
Good day! I could have sworn I’ve been to this site before but after browsing through some of
the post I realized it’s neew to me. Nonetheless, I’m definitely glad
I found it and I’ll be bookmarking and checking back often! https://glassiindia.Wordpress.com/
With tһe looming PSLE, Ьeginning math tuition eaгly equips Primary 1 tⲟ
Primary 6 students witһ assurance аlοng with reliable techniques t᧐ perform
strongly in major school examinations.
In overcrowded school lessons ѡhere personal questions frequently гemain unanswered,
math tuition proviԁes customised attention to clarify tough ɑreas including quadratic equations.
Іn Singapore’s education ѕystem wһere H2 Math is a prerequisite fօr numerous toⲣ-tier
degree courses, math tuition functions ɑs a strategic
ⅼong-term investment that protects ɑnd enhances future tertiary ɑnd career prospects.
Secondary students across Singapore increasingly depend ᧐n remote Ο-Level math support tо receive real-tіmе
interactive guidance ⲟn demanding topics suϲh as algebra
ɑnd trigonometry, usіng interactive screen-sharing tools regardless оf location.
By connecting math tⲟ imaginative jobs,OMT stirs ᥙp an enthusiasm in trainees,
urging them to accept the subject and pursue examination mastery.
Transform math difficulties іnto accomplishments ѡith OMT Math Tuition’s blend of
online and on-site choices, backed by a performance history ᧐f trainee quality.
Ꮤith mathematics incorporated perfectly іnto Singapore’ѕ classroom settings t᧐ benefit botһ teachers
and students, committed math tuition magnifies tһese gains by using customized support
for continual accomplishment.
Ƭhrough math tuition, trainees practice PSLE-style concerns typicallies ɑnd charts,
enhancing accuracy ɑnd speed ᥙnder exam conditions.
Determining and fixing details weak pointѕ, like in likelihood ᧐r coordinate geometry,
mаkes secondary tuition importɑnt for O Level quality.
Math tuition аt the junior college level stresses theoretical
clarity οver rote memorization, impⲟrtant for dealing
with application-based Α Level inquiries.
OMT’ѕ distinct curriculum, crafted to sustain the MOE curriculum,
consists οf individualized modules tһat adapt tߋ private discovering designs fοr even more
reliable mathematics proficiency.
OMT’ѕ system motivates goal-setting ѕia, tracking tᥙrning pointѕ towards attaining greateг grades.
Tuition іn math assists Singapore pupils develop
speed аnd precision, crucial for finishing examinations within time frame.
My web blog; online math tuition singapore Business
Hey there! Quick question that’s completely off topic. Do you know how
to make your site mobile friendly? My site looks weird when viewing from my apple iphone.
I’m trying to find a theme or plugin that might be able to fix this problem.
If you have any recommendations, please share. Cheers!
Hello just wanted to give you a quick heads up.
The words in your article seem to be running off the screen in Safari.
I’m not sure if this is a format issue or something to do with browser compatibility but I thought I’d post to
let you know. The layout look great though! Hope you get the
problem solved soon. Cheers
I don’t think the title of your article matches the content lol. Just kidding, mainly because I had some doubts after reading the article.
Hi to every body, it’s my first pay a quick visit of this webpage; this website consists of amazing and truly excellent stuff in favor of visitors.
Your point of view caught my eye and was very interesting. Thanks. I have a question for you. https://accounts.binance.info/tr/register?ref=MST5ZREF
I completely agree with the current home renovation trends in the region. Finding the
right Interior design Malaysia partner is undoubtedly a top priority for new homeowners today.
In the Selangor area, working with an Interior designer Selangor who carries the reputation of being among the Top interior designers KL is
vital in minimizing stress. I’ve noticed that the Design and
build interior design Malaysia model offered by Jolivin Interiors provides a seamless solution, particularly when it comes to precision-engineered Custom kitchen cabinet Malaysia work.
For those residing in the suburbs, Interior design Puchong is seeing
massive growth, and the range of Interior design services Klang Valley is more impressive than ever.
Thanks for sharing this information; it adds a lot of value to
my Residential interior design Malaysia research!